Lab 2: Version Control with Git
Welcome to Lab 2! For a later section of the lab, you will work in groups of 2-3. Before starting the lab, form your group and do the icebreaker activity together. Let a TA or tutor know if you don’t have a group!
📋 Start your lab report!
Lab 2 Learning Objectives
- Enable your
ieng6account to communicate with GitHub on your account’s behalf - Familiarize yourself with the conceptual model of Git
- Try out essential operations in Git on the command line
- Use Git to undo a destructive change
Table of contents
- Lab 2 Learning Objectives
- Icebreaker
- PA1: Start Early Start Often
- The Key to Git
- Git Gud Bro
- Oops! Undoing destructive changes
- Next steps
Icebreaker
In your groups, please discuss the following:
- If you could time travel to any point in history (past or future) for just 24 hours, where would you go and what’s the first thing you’d do?
PA1: Start Early Start Often
This is the motto of the CSE department.

The Key to Git
Recall from last lab how to log into your ieng6 account:
$ ssh your account name@ieng6.ucsd.edu
Please log into ieng6. Within your ieng6 account, use the following command to generate a new key pair, replacing github_email with your GitHub email address:
$ ssh-keygen -t rsa -b 4096 -C github_email
You’ll be prompted to “Enter a file in which to save the key”. Press Enter to accept the default location. You’ll then be prompted to enter a passphrase, which isn’t really necessary. Press Enter twice to continue without setting a passphrase. Though if you really want to set a passphrase, refer to GitHub docs on passphrases.
Adding your SSH key to GitHub
By default, the public SSH key is saved to a file at ~/.ssh/id_rsa.pub.
Instead of typing out the whole filename, you can type out some prefix of the name (e.g. ~/.ssh/id), and press Tab to autocomplete the name. In this case, tab complete won’t complete the full filename, since the private key happens to be named id_rsa. Please be too lazy to type out entire filenames and use tab complete instead!
View the contents of ~/.ssh/id_rsa.pub (using cat), then copy the contents of the public key file to your clipboard.
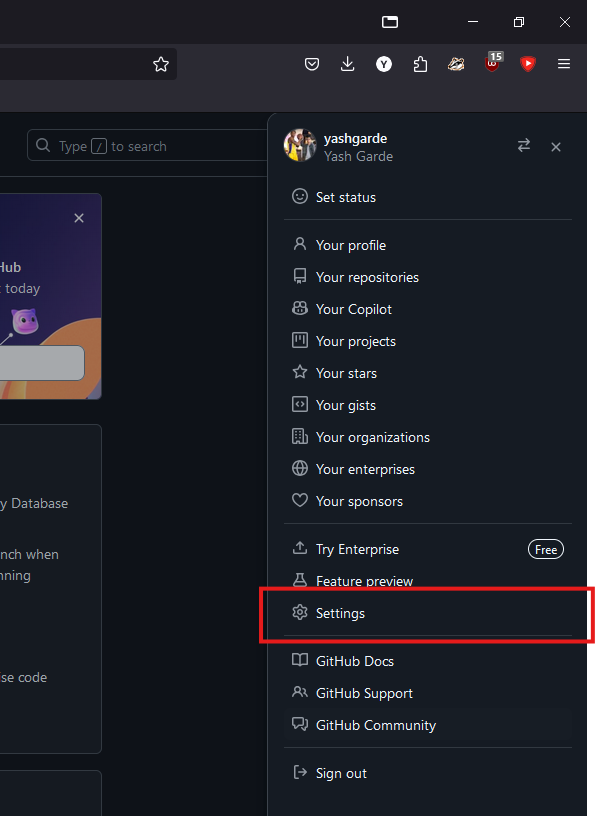
On the GitHub website, click your profile picture in the top right to open a menu, and click on “Settings”.
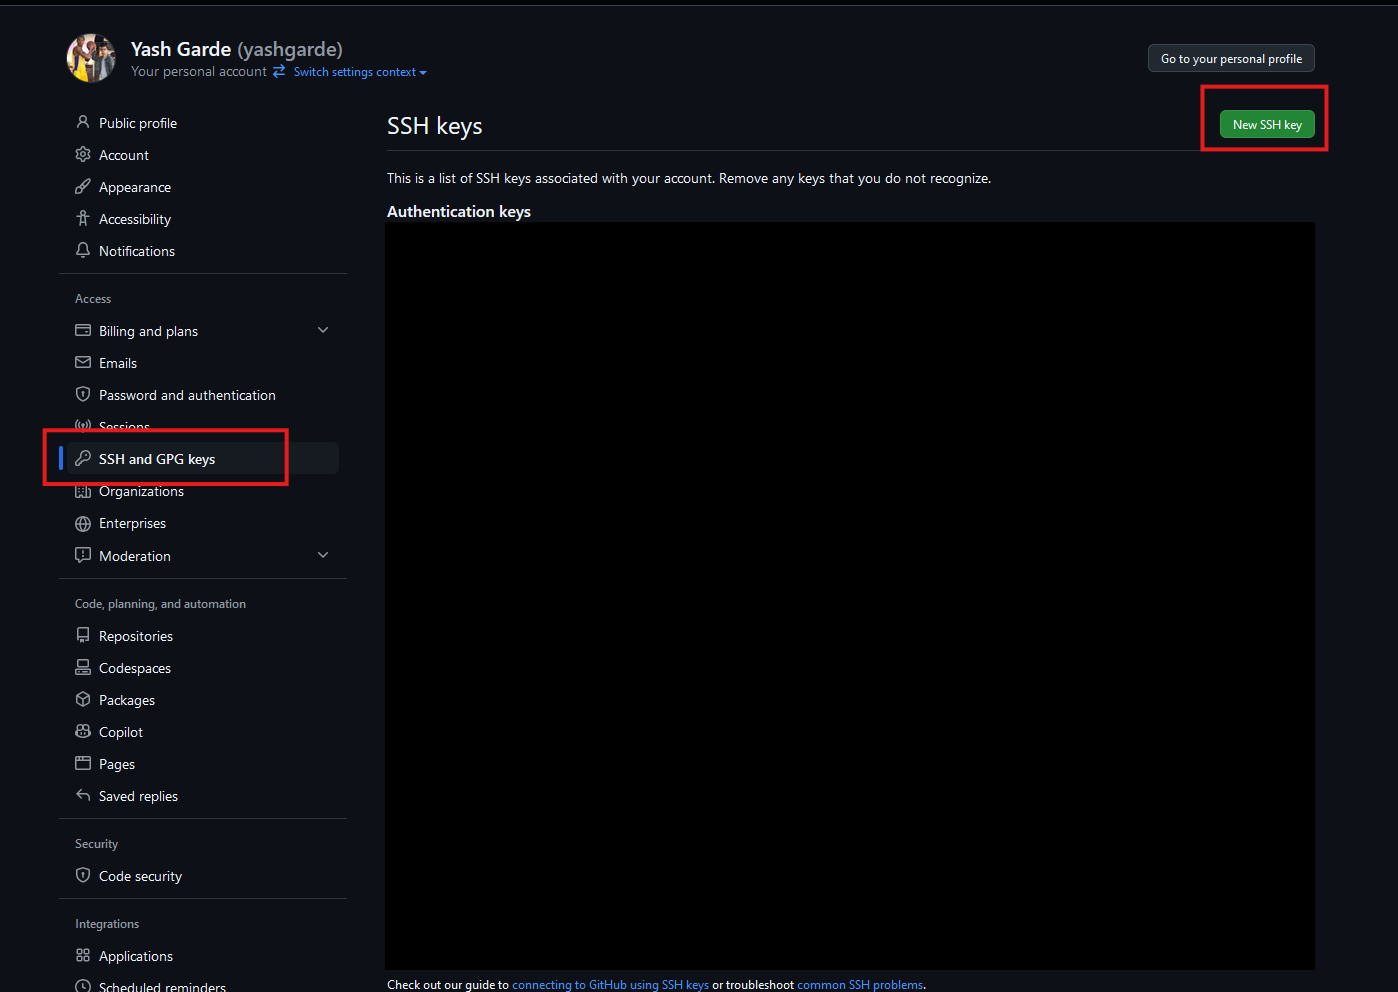
On the left, open “SSH and GPG keys”, then click on “New SSH key”.
Populate the fields as follows:
- Title: “ieng6”
- The title doesn’t affect the functionality of the key, it’s just a note for you that this key is tied to your ieng6 account.
- Key type: “Authentication key”
- Key: Paste the contents of the public key file here (entire block including the email portion).
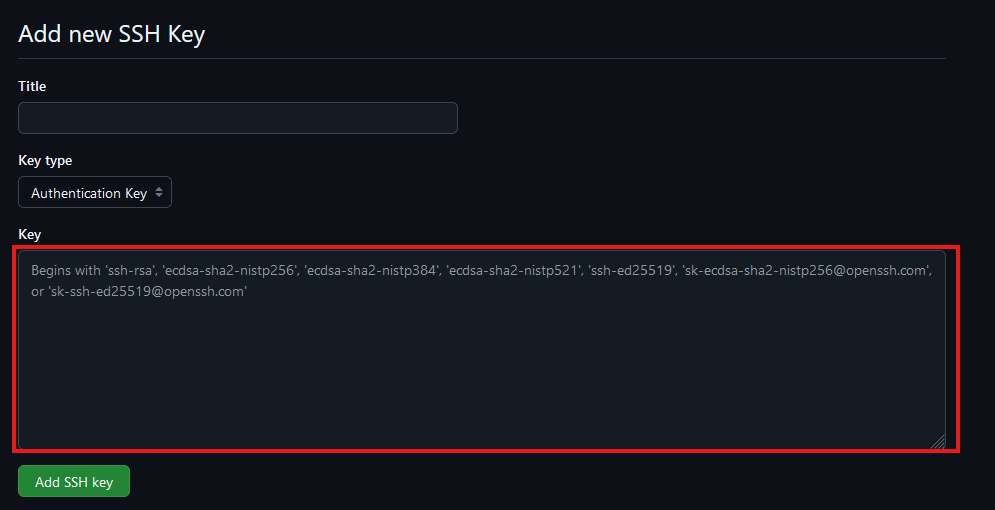
Click “Add SSH key”. You may need to confirm access to your account on GitHub at this point.
Testing your SSH key
Finally, test your connection to GitHub with the command:
$ ssh -T git@github.com
If this is your first time connecting to GitHub, you might get a warning about the “authenticity of host can’t be established”. This is a warning for you to make sure that you’re connecting to the right thing. For the purposes of this lab, we assume that GitHub didn’t suddenly get hacked, so you can safely respond with “yes”. But if you’re really paranoid, you can check GitHub’s public key fingerprint here.
After a successful connection, it should output Hi <your-username>! You've successfully authenticated, but GitHub does not provide shell access.
📋 Take a screenshot of this (successfully authenticated) message and put it in your lab report! No need to have a tutor check it.
That should conclude the GitHub SSH key setup process. If the others in your group are struggling with this, please help them! The next step will require everyone in your group to be able to successfully connect to GitHub.
Git Gud Bro
For this section of the lab, you should work in groups of 2-3. Let a TA or tutor know if you don’t have a group!
Have one member of the group follow this link to accept the assignment for this lab on GitHub. Create a team for your group (give it any name you want!), then the other group members should add themselves to the team by following the link themselves.
Before you start using git hands-on, we should establish some vocabulary and concepts about git and GitHub.
- git is a command line program that enables version control, i.e. the ability to track and switch between different versions of your code, including switching to past versions.
- A repository (or repo) is a folder, usually containing code, which is configured to work with git to manage different versions. When you accepted the assignment on GitHub Classroom, it should have automatically created an empty repo for your group.
- GitHub is a website which hosts repos, allowing you to save your work on a server, and can allow people to contribute to others’ repos.
If there is any software which most (if not all) programmers use, it’s git and its integration with GitHub. That’s why knowing how to use git and having a GitHub account are essential for programmers.
git organizes your code files in a particular way to give you flexibility in how you manage different versions of your repo, which we’ll visualize below. Note that git does not actually create distinct “areas” in your repo directory and move files between them, but we may refer to them analogously as if they were physical areas that files move in and out of.
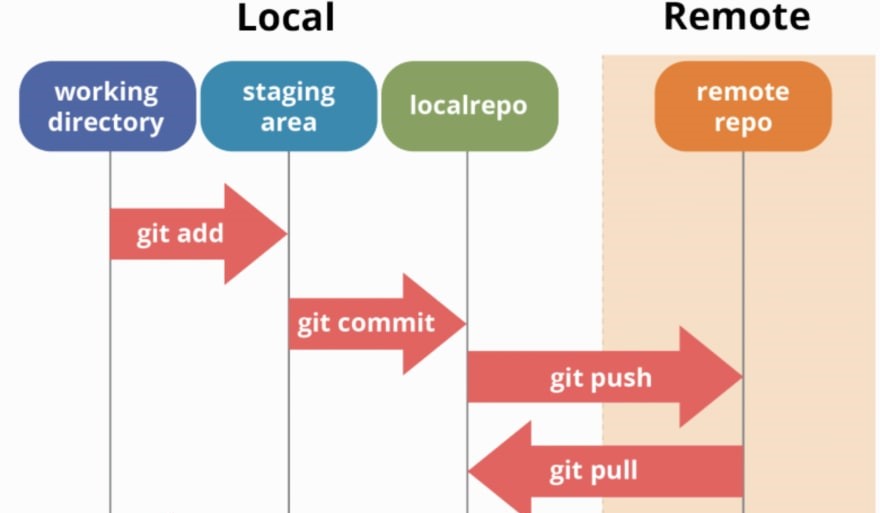
We refer to files stored on your device as local, and files stored on GitHub (in a server far away) as remote. Technically, files in your ieng6 account are remote relative to your machine, but we will consider them local relative to the GitHub servers.
-
The working directory refers to all of the files and folders in a specific version of your repo. Note that this definition only applies to git repositories. Don’t get it confused with your current directory in the terminal (
pwd)! -
The local repo contains a history of committed files (or just commits). You can think of a commit as a set of modified files which are “packaged” together and labeled. This method lets us easily group and track the history of changes for our files.
-
The staging area temporarily contains files that will go into the next commit. This exists to let you neatly organize what should be committed. For example, if your workflow involves making changes to lots of files, but you want to separate them into different commits, you can separately stage and commit groups of changes.
-
The remote repo is a repo that is hosted on GitHub. After commits are made to the local repo, you can push them to the remote repo to save your work on a server.
git contains many commands which let you manipulate and move files within this system of organization. We’ll practice some essential commands in the upcoming exercises.
If you did not complete Lab 1, you may run the following commands to download our shell script to create a cse29 folder with the directory tree example contents:
$ wget https://cse29.site/assets/labs/lab1_commandline/exercise.sh
$ chmod 755 exercise.sh
$ ./exercise.sh
Clone the Repo
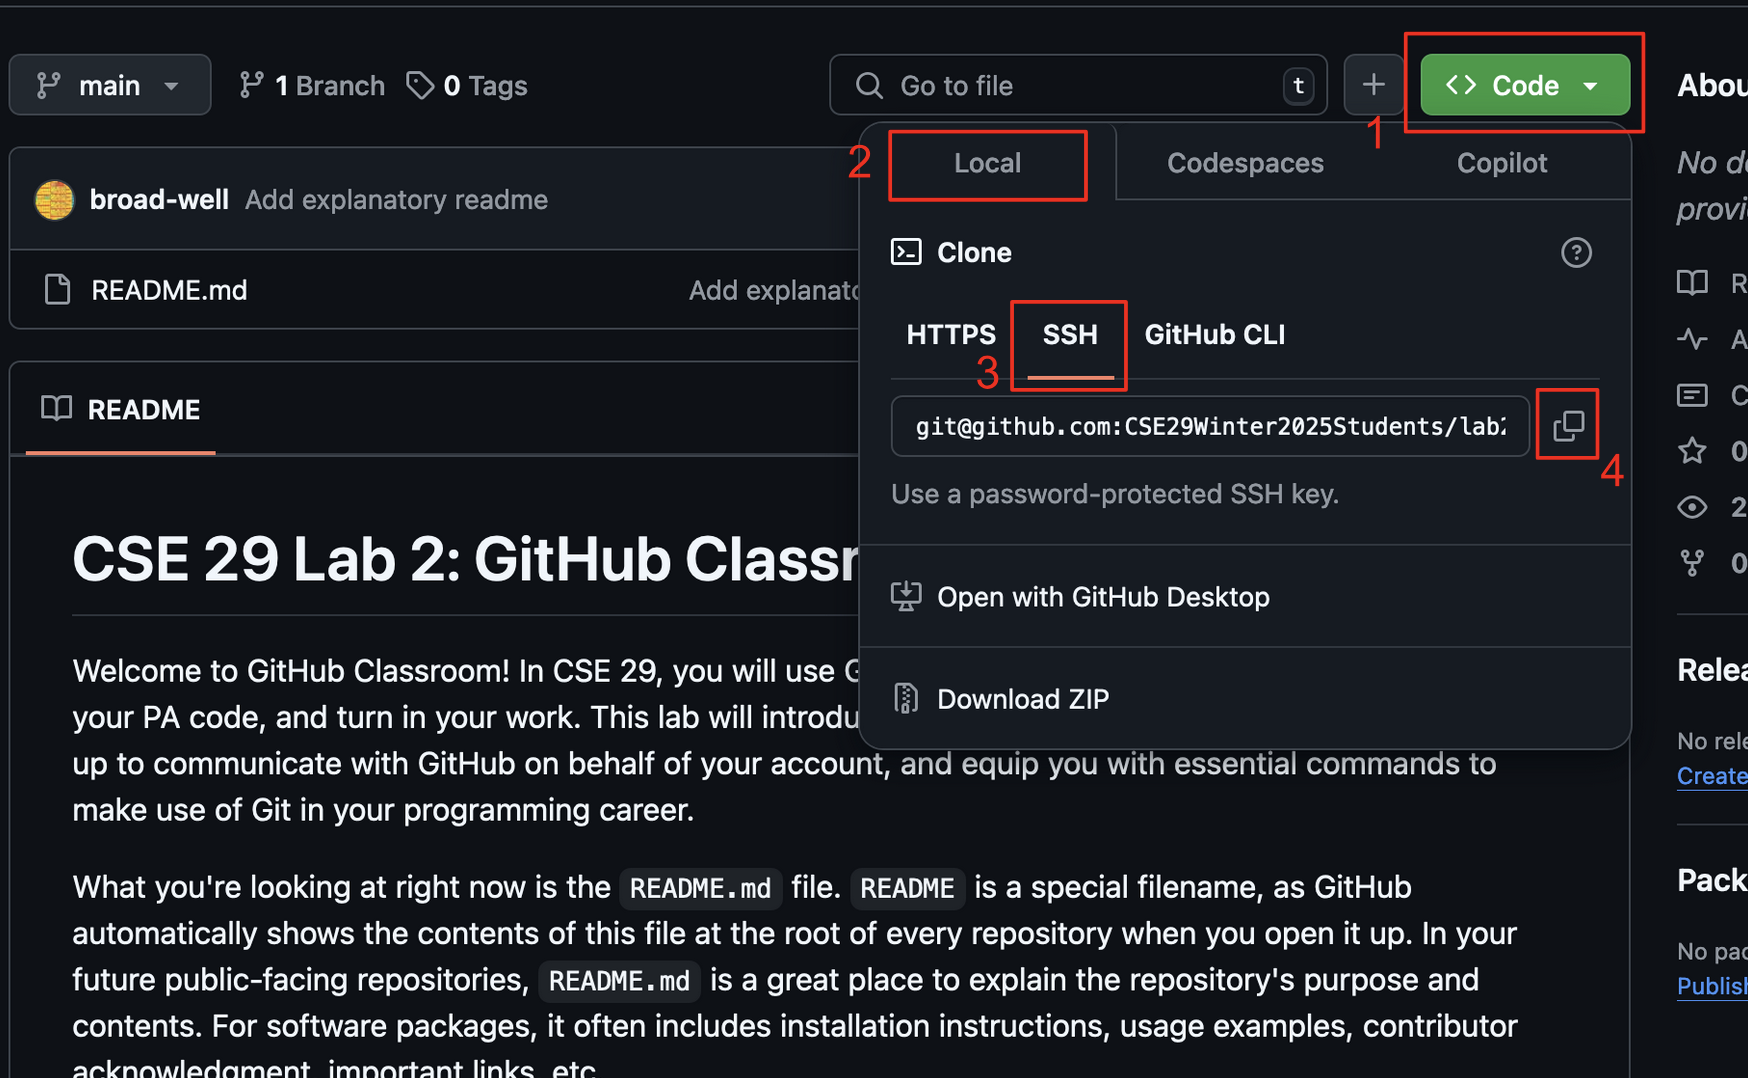
First, find the SSH url for your group’s repo. You can do this by following the guide above, clicking the buttons in the order presented to copy your repo’s URL onto your clipboard. Making sure you get the SSH url and not the HTTPS url!
To get a copy of the remote repository you just created onto your local machine, use the git clone command to clone a copy of the repo like so:
$ git clone ssh_url
Each group member should clone their repo into their cse29 folder, created from the previous lab.
A new folder will be created in cse29 with the remote repo name and set up as a local repo. Change into this repo directory.
Make sure you changed into the repo directory!
If you accidentally cloned the repo into the wrong place, you can move the repo directory to the right place with $ mv repo_name ~/cse29/repo_name , where repo_name is the name of your repo. This command is also used to move and rename files.
Call over a tutor to get checked off for successfully cloning the lab2 repo onto your ieng6 machine in your cse29 folder. Also have your tutor make sure that you and your teammates have correctly completed the command line exercise from lab 1, with the Books and Music directories being correctly named and structured.
“You have good taste!”
Remember those books and songs that you created last week? Now it’s time to pool them all together into one big Books directory and one big Music directory! Before you proceed, make sure that everyone on your team has done the previous checkoff, as it is crucial each person’s lab1 files are properly organized.
Copy over the content of your lab1 directory into your lab2 repo. You can do this by using the cp command like so:
$ cp -r ../lab1/* .
This command “recursively” (-r) copies “everything” (*) from the lab1 directory in the “parent directory” (..) into the “current directory” (.).
You can use git status to see the state of the local repo with a new file. git status is a generally useful command to use to look at the state of the repo at any time; expect to be using this often! Its output will look something like this:
$ git status
On branch main
Your branch is up to date with 'origin/main'.

Untracked files:
  (use "git add <file>..." to include in what will be committed)
        Books/
        Music/
        contains.c

nothing added to commit but untracked files present (use "git add" to track)
“Untracked” is a status for files and directories that have not been committed to the local repo previously, indicating that git is not tracking the history of changes in this file. After a file becomes tracked, and further changes are made to the file, the file is referred to as “modified”. git add is used to both track untracked files and stage modified files:
$ git add Books Music
Here, we are ignoring contains.c because letting Git track it would lead to thorny merge conflicts with your group later on, as each of you has slightly different code in it. Check using git status to see that Books and Music are now staged.
Next, use $ git commit -m "insert-commit-message" to commit all files into the staging area to the local repo. Replace insert-commit-message with a brief description of what changed in this commit.
The -m option allows the user to directly write a commit message as a string in the command. If you were to run git commit without this option, it will open vim and instruct you to write a commit message there. Generally, commit messages are concise enough that using a text editor to write them out is unnecessary.
Writing a meaningful commit message is quite useful, and usually expected in a professional setting. The commit message serves as a way for others (and yourself, in the future, looking back) to easily understand what changes were made in a commit without having to read through the changes manually.
Besides -m, there are other common options that programmers use with git commit:
git commit -a: automatically stages all modified files in the working directory, but not any untracked files.git commit -am: has the behavior of both-aand-moptions.
At this point, all your teammates should have their Books and Music directory committed in their local repository. You should now work together at this point.
Have one teammate (let’s call them “Person 1”) push their changes from the local repo to the remote repo:
$ git push
Next, have another person (let’s call them “Person 2”) try running git push. You should run into an error that starts with the following:
! [rejected]        main -> main (fetch first)
error: failed to push some refs to 'github.com:CSE29Spring2025Students/lab2-<your-team-name>.git
This is git’s way of reporting a conflict between the remote repo (which has person 1’s commit) and the local repo (which has person 2’s commit). A conflict exists because the two commit histories “diverge”, taking on different paths. Do as the message tells, and use git pull to pull your teammate’s changes:
$ git pull
You might see the following hint as a result:
Hint: You have divergent branches and need to specify how to reconcile them.
Hint: You can do so by running one of the following commands sometime before
Hint: your next pull:
Hint:
Hint: git config pull.rebase false # merge
Hint: git config pull.rebase true # rebase
Hint: git config pull.ff only # fast-forward only
Run the first suggested command (git config pull.rebase false) to select merge as the default way to reconcile divergent branches. You can learn more about the difference between rebasing and merging here, which claims that the golden rule of rebasing is to never use it on public branches. After this command, retry git pull again, which should merge Person 1’s contributions with the local repo.
Now you can safely push your changes:
$ git push
This pull and push cycle is your bread and butter in collaborative development in git, where you pull your teammates’ changes, and push your own changes on top of them.
Sometimes, if the changes you make on your local repo are incompatible with the changes a teammate made, a merge conflict will occur when you attempt to pull your teammate’s code. All kinds of headaches result from this, but luckily, you don’t have to worry about that. For now.
Have the rest of the teammates pull the changes from remote, and push their changes.
To see who pushed what, you can use the git log command to log all the changes that were made by both you and your teammates. Try it! (To exit out of a long git log, press q)
$ git log
To see specifically who added what, you can add the --name-status option to the git log command.
$ git log --name-status
Now you can see what songs and books your teammates enjoy! Albeit it probably would have been easier to just have a conversation and talk about your preferences, but alas, this is the CS major way of doing things.
We’ll revisit Git in a later lab and in your own time, if you’d like to learn more about some of the concepts introduced today such as commits and how they are tracked, you can look into the Le Git Graph browser extension and its GitHub repository. You can also check out this interview with the creator of Git that celebrates its 20th birthday this year, woo!
Call over a tutor to get checked off for successfully having a repo with you and your teammates’ shared Music and Books folders. Show them the result of running git log --name-status, as well the contents of the folders themselves.
Oops! Undoing destructive changes
To illustrate that Git is useful even for individual projects (like your PAs), let’s create a scenario where you make a destructive change to your code. We’ll reuse the contains.c file you may have written in Lab 1.
If you wrote contains.c and successfully compiled it in Lab 1, check if you have contains.c in your local repo directory. If you don’t, use the cp command to copy it into the root of your Git repository. You may find the following command helpful—it means “Copy the contains.c file from the lab1 directory found inside the parent directory into the current directory”. You may need to navigate to the root of your Git repository before you run it.
$ cp ../lab1/contains.c .
..means “parent directory”.means “current directory”, as in the output ofpwd(remember?)
If you did not successfully compile contains.c in Lab 1, you may run the following command at the root of your Git repository to download a working version from us.
$ wget https://cse29.site/assets/labs/lab1_commandline/contains.c
Occasionally, ieng6 throttles connections to GitHub. If this command gets stuck for too long (like 5 seconds), abort it by pressing Ctrl+C and try it again. No need to copy-paste: just press the up arrow in the terminal to populate it with a previous command. You’ll find the arrow keys very helpful in the terminal!
Now, let’s package our change (of adding a C source file) by making a commit. Use what you have learned in the previous section to (1) let Git track contains.c and (2) make a commit that represents adding contains.c to the repository. Do not push your commit onto GitHub! Feel free to verify your work with git log and git status.
We’re ready for the destructive change. Read the following commands to understand what they do, confirm your understanding with your group, and run them:
$ gcc contains.c -o contains -Wall
$ ./contains > contains.c
$ cat contains.c
Oh no—your source code is gone! If you run git status now, you should see the following:
Changes not staged for commit:
 (use "git add <file>..." to update what will be committed)
 (use "git restore <file>..." to discard changes in working directory)
       modified:   contains.c
To undo our destructive change, we precisely need to “discard changes in working directory” relative to our last commit. So, let’s follow the instructions from git status to restore contains.c. Please compose the command on your own from the instructions.
Call over a tutor to get checked off for successfully restoring your destroyed contains.c contents, and paste a screenshot of your entire terminal window into your lab report. You are now ready to submit it to Gradescope!
You might have heard about git revert, git reset, and git restore. Each command performs a unique operation. Learn more about what they do with Git’s official documentation.
Next steps
As before, in the second half of Lab 2, you may work on new Review Quizzes on PrairieLearn.
Feel free to collaborate with your peers and ask questions. Good luck!